
How to tie a cravat: A step-by-step guide
| March 22 2025How to tie a cravat: A step-by-step guide
There are a few ways of styling a cravat to create different looks, so we’re going to show you our favourite.
So, here’s our simple step-by-step guide on how to tie a cravat.
Step One
Place your cravat around your neck. You’ll have a wide side and a slim side.
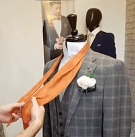
Step Two
Cross the wide side over the slim side - we’ll begin to tie the cravat from the point at which it begins getting wider.
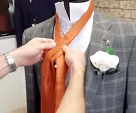
Step Three
Keep a loose hold of both sides to keep it in place, be sure not to hold it too tightly so that you’re able to manipulate the fabric. Bring the wide side around the back and out.

Step Four
Continue to bring it back over the front, being sure to keep it nice and straight. Keep one hand gently holding the middle so that you don’t lose the shape! You’ll see that you’re already starting to create the knot for your cravat!

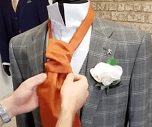
Step Five
Next, keeping a loose hold of the middle with one hand, bring the tie up through the gap.

Step Six
Check that it’s gone all the way around without twisting and bring it down in front so that you can smooth it out and remove any little twists.

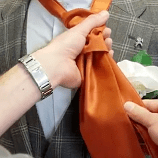
Step Seven
Gently let go of the middle and use that hand to put your fingers up through the bottom of the knot. From here you can help guide the fabric as your other hand brings the widest end of the tie down through the knot.

Step Eight
You should currently have something that looks like this! Now, it depends on your preference as to whether you want a wider or slimmer knot on your cravat.
Step Nine
Take hold of either side of the tie (just below the knot) and gently pull down at an angle (ie. pull the left side slightly to the left and the right side slightly to the right!) Be sure to keep it quite loose at this stage so that you can adjust it easily.

Step Ten
Take hold of the little end (narrow end) at the back of the knot and, just as you would a normal tie, slide the knot up while gently pulling the narrow end down. You’ll now have your knot in the correct position and can tighten it up if you want to.
Because the knot is looser than a standard tie, you can easily manipulate it until you have your perfect shape.
And there you have it!
We’re made a handy how-to video to accompany this blog, so why not head over to our YouTube channel and take a look? You’ll be able to see all the steps highlighted above and gain an even clearer understanding of how to achieve the perfect cravat.